Outcomes
Use inspection outcomes to record the decision made for an inspection and make those inspections easier to find later.
In the Vision Dashboard, go to Settings > Outcomes to define the decisions reviewers can assign, such as "Approved" or "Rejected". This information can sync between Vision and your information system.
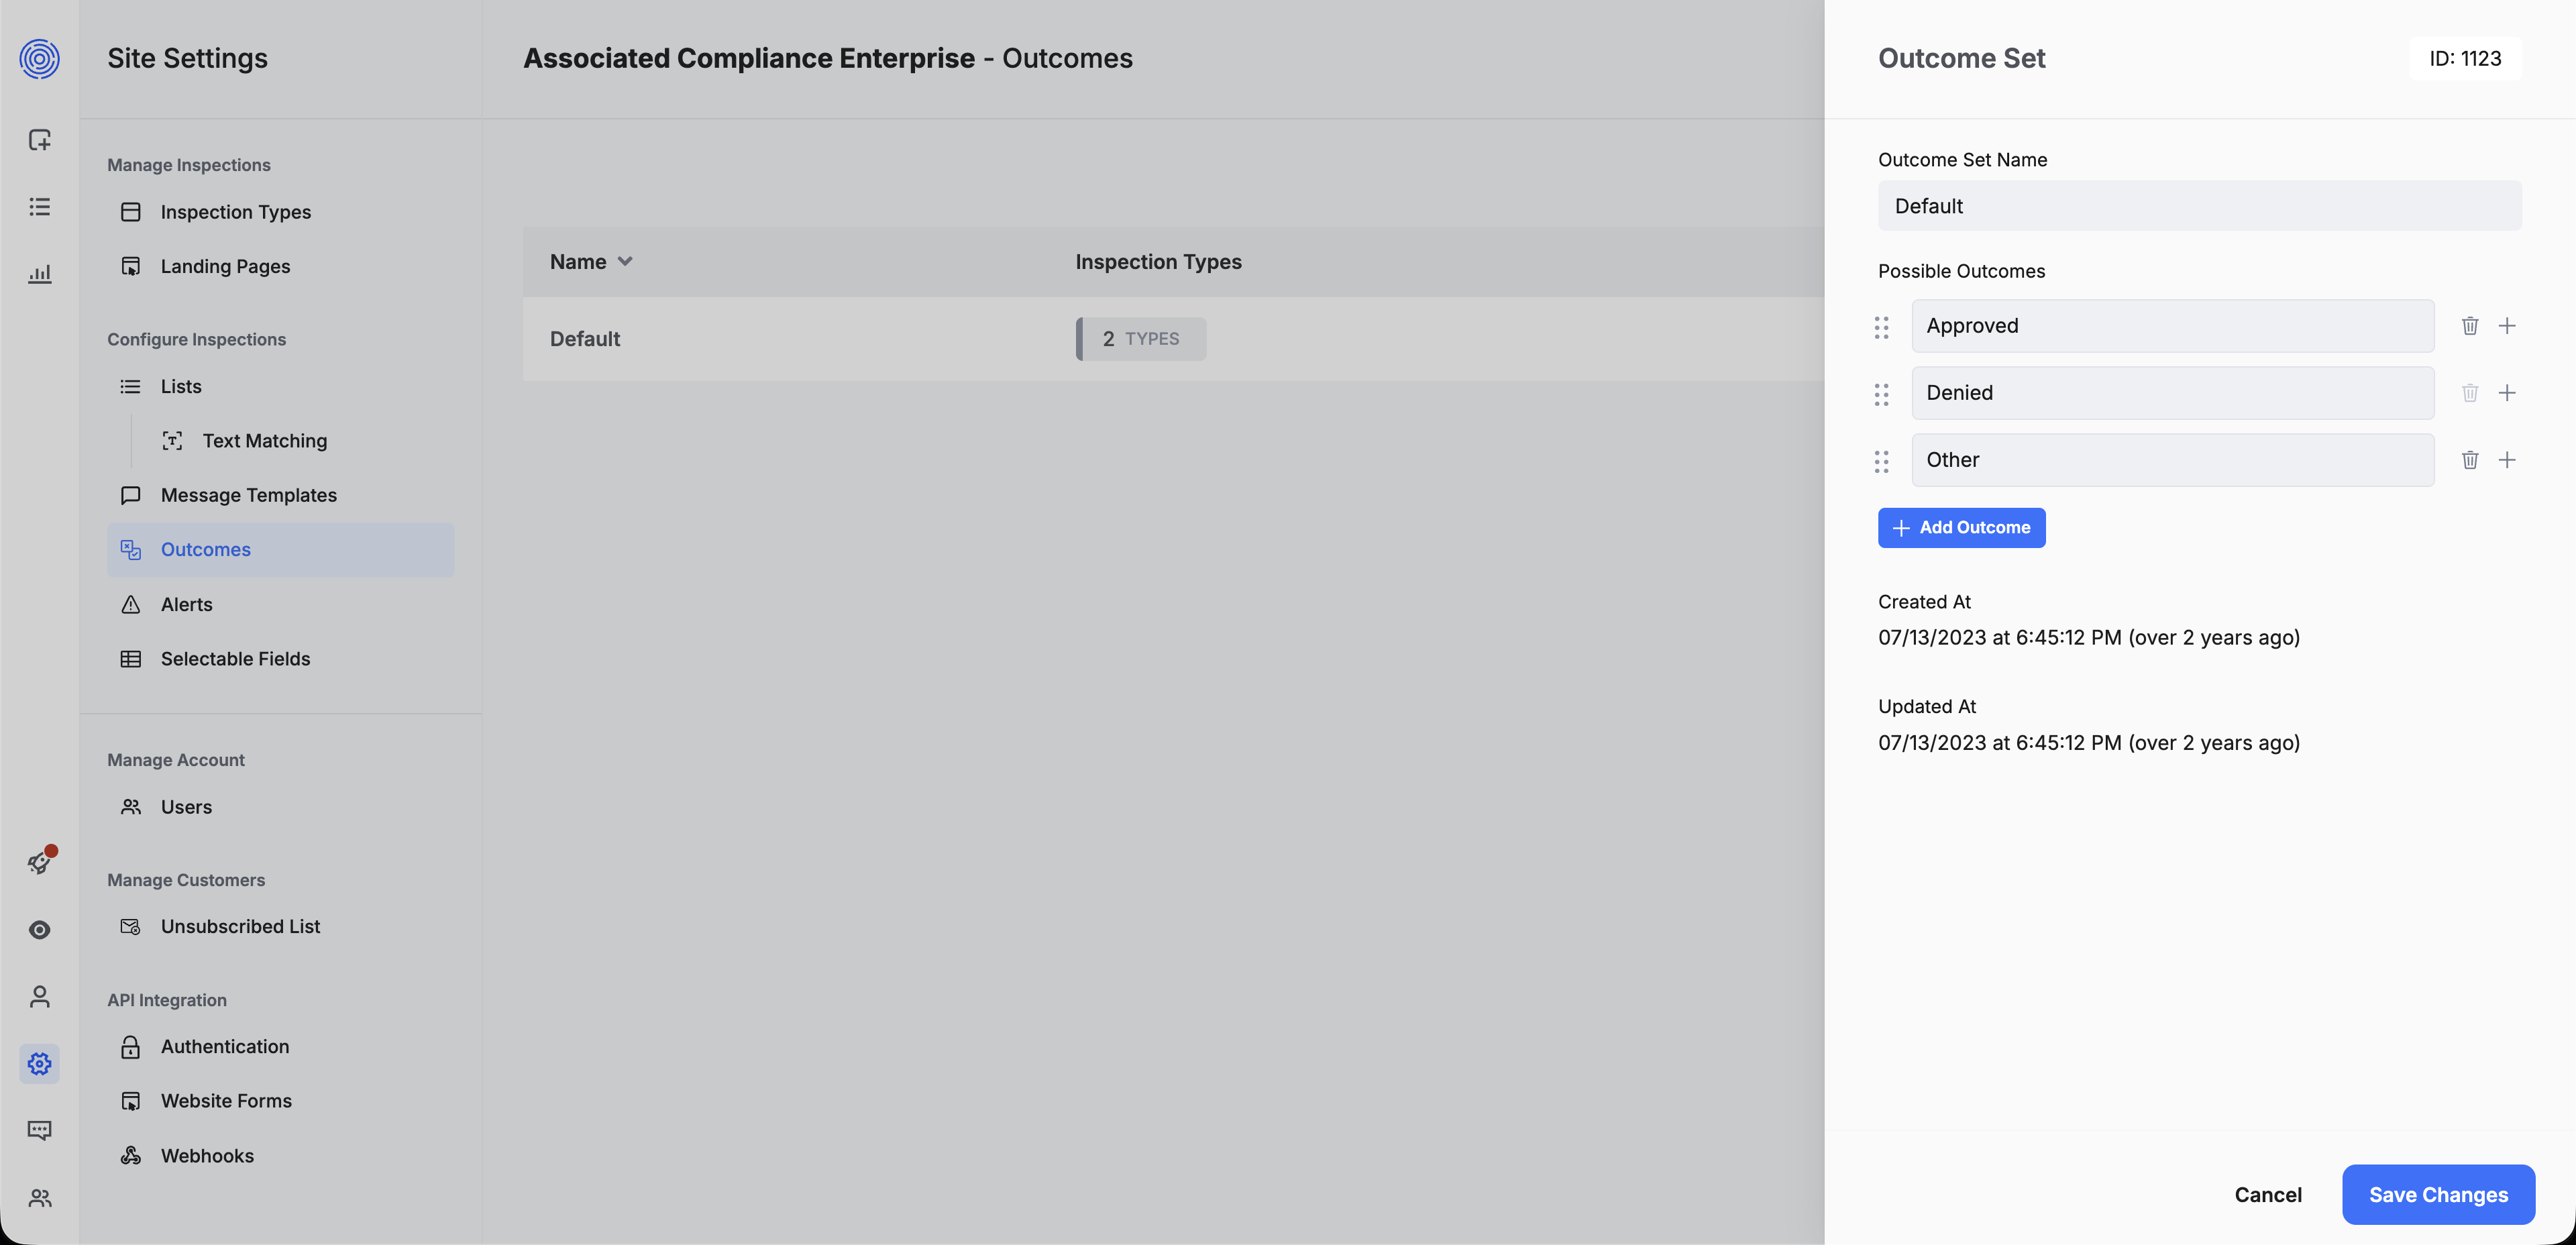
Vision Dashboard. Example of configuring an inspection outcome.
Each outcome can include an unlimited number of choices. After you assign an outcome to an inspection type, updates to inspections of that type can include outcome_id and outcome_reason.
outcome_id: the ID of the selected outcome configured in the Vision Dashboard.outcome_reason: additional reason or description for that decision.
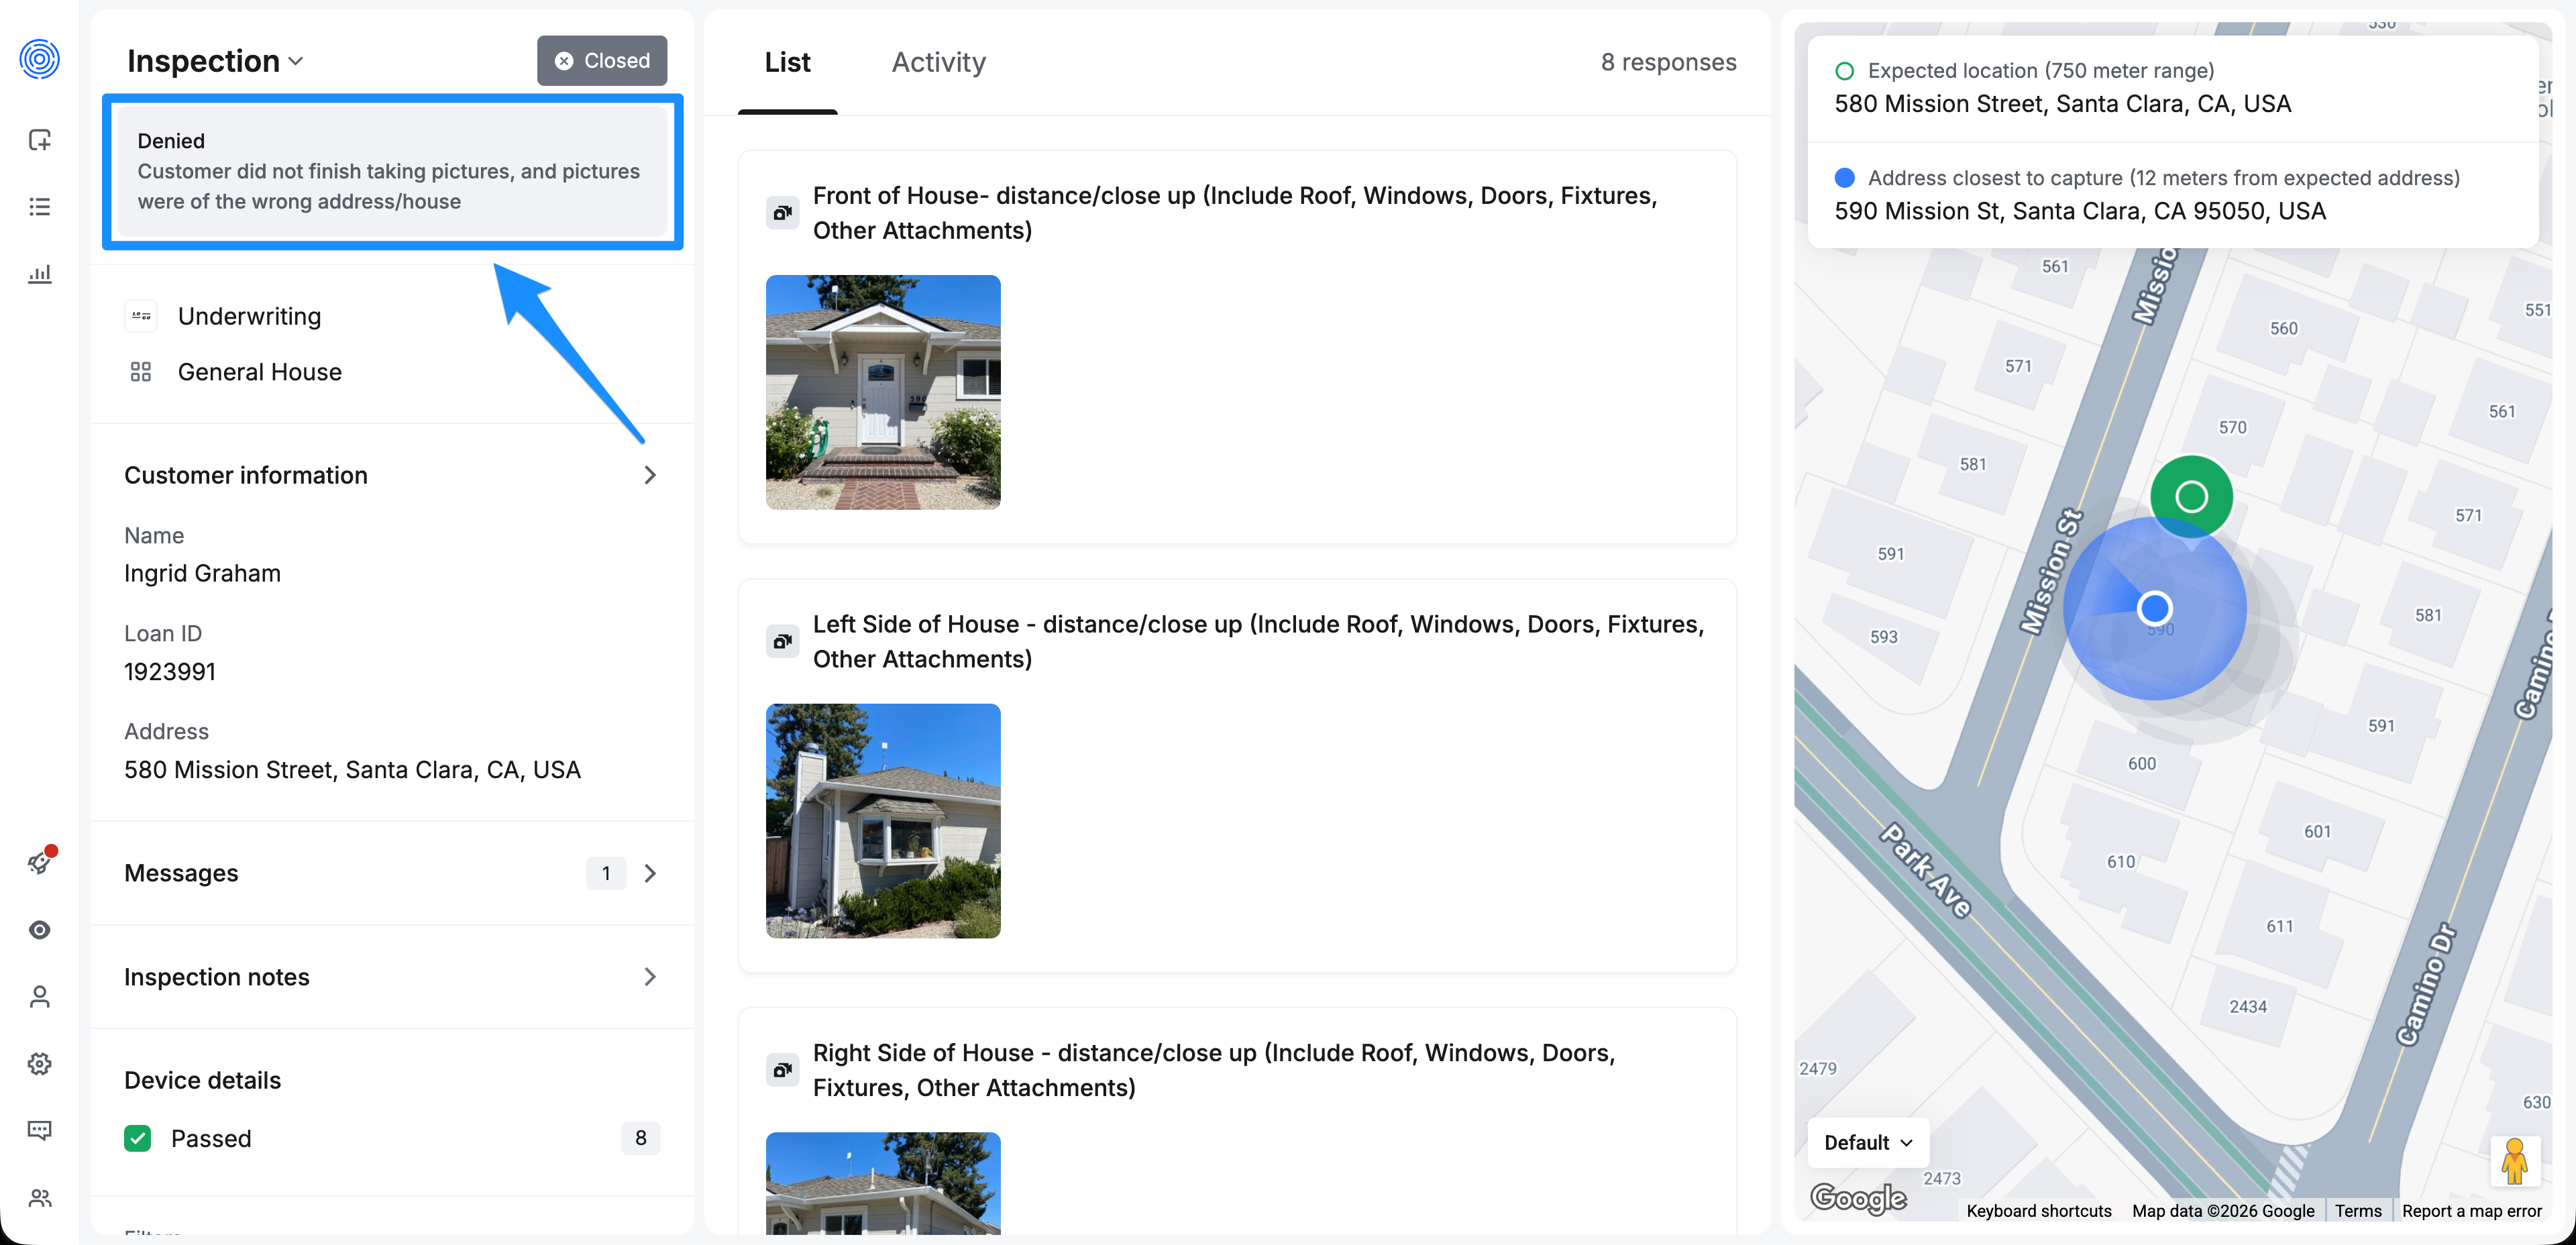
Vision Dashboard. Example of a "Denied" inspection outcome with additional reasoning.
Close Inspection with Outcome
To assign an outcome, update the inspection with the PUT /v3/inspections/{inspectionId} endpoint. This is the same request described in Inspections > Update an existing inspection request. Include outcome_id to record the decision and outcome_reason to add more detail.
Example Request Body
{
  "outcome_id": 1124,
  "inspection_status_id": 5, // CLOSED
  "outcome_reason": "Customer did not finish taking pictures"
}
Once you do this, in the inspection payload you will be able to see the outcome that as assigned. It will look like this:
 "outcome": {
   "id": 1124,
   "name": "Denied",
   "reason": "Customer did not finish taking pictures, and pictures were of the wrong address/house"
 },